This guide aims to provide basic information about the dungeon Tal-Rey’s Tomb that applies generally to all classes, and is meant for players who are not yet familiar with the dungeon and its mechanics. Bonus rooms are not covered.
General Information
Tal-Rey’s Tomb is the most difficult dungeon in Vesteria. It requires well-scrolled, high level gear, knowledge of the dungeon and its mechanics, and a good team in order to complete it successfully. It follows a similar pattern to Spider Abyss and The Hive in the sense that there are several rooms to complete leading up to a final boss fight. However, unlike those dungeons, the rooms in this dungeon do not change, and always follow the same layout and requirements.
Furthermore, the final boss fight with Tal-Rey is significantly more involved than the Spider Queen and Queen Rubee fights. There are several phases, each with their own attack patterns and mechanics to learn.
If you die before the Tal-Rey fight, you will respawn at the Tal-Rey fight, provided the rest of your party can make it there, so don’t quit just because you died before the boss!
Fully ancient scrolled gear will likely be sufficient, provided that the gear itself from a base stat/perk perspective is viable for your class. Of course, you can also hope that others are willing to carry you for your first few runs, but this may make it harder to find parties.
Vases can be found throughout the dungeon that can be broken by hitting them using your weapon (M1). Normally, the vases drop a few Holo Coins, but on rare occasions they can drop equipment items. This guide does not cover all of the vase locations. For more details, see the “Extra Sources” section at the bottom of the guide.
Room 1 - Scorpion Room
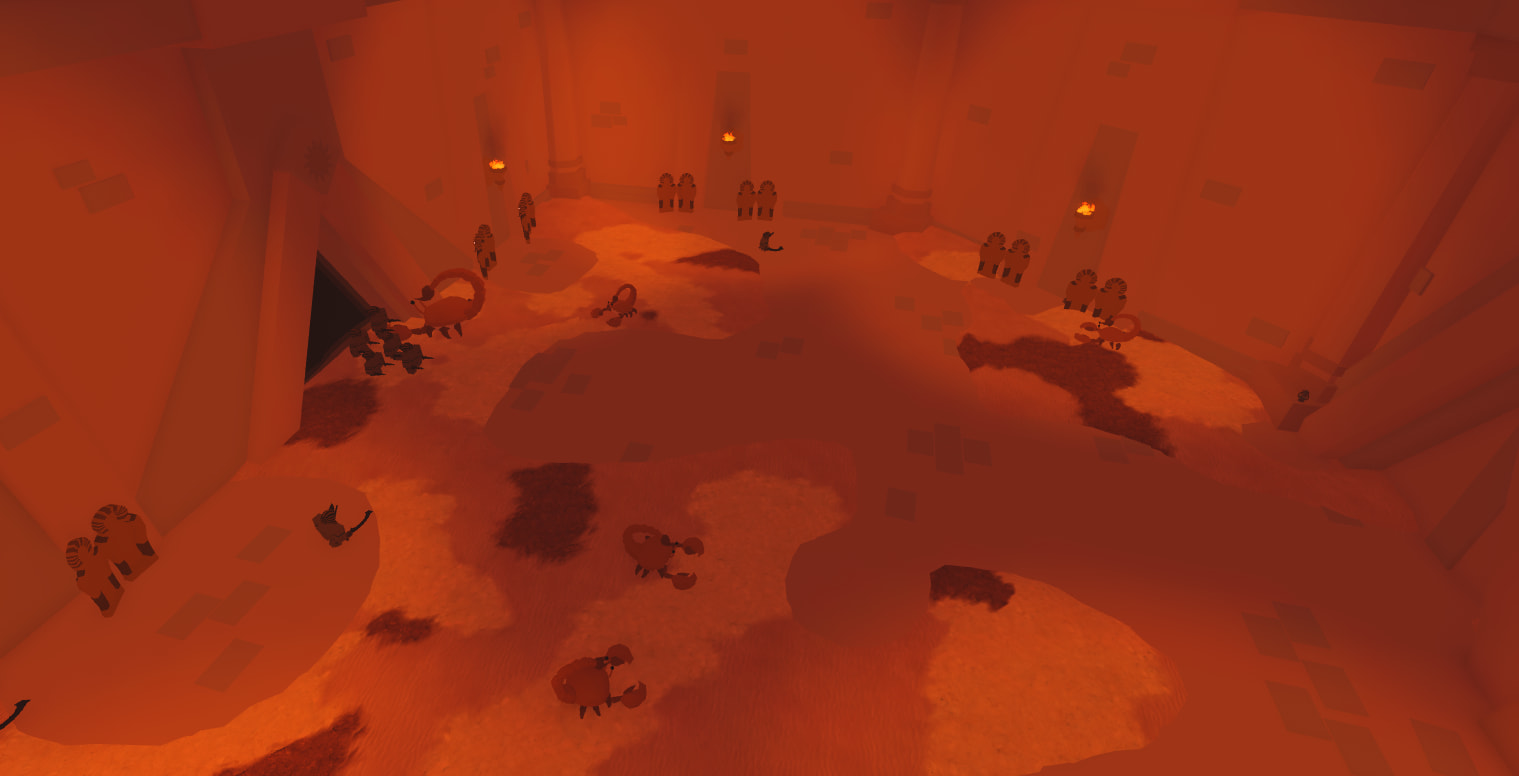
At the start of the dungeon, once the initial “ready up” timer is completed, you will teleport into a room with a large number of Scorpion and Mummy enemies, as well as a Giant Scorpion, with the goal to kill all of the mobs to proceed. This is a fairly straightforward room similar to those in other dungeons.
There are a couple things to be aware of even in this room. Try to stay in the center of the room. The blade spin attack Mummies can do deals significant knockback and stamina drain, and if you get caught on the edge of the room, your HP can quickly get shredded. Another thing to note is that sometimes one of the enemies will end up clipping through a wall if they hit multiple Trickster traps at the same time, or rarely due to Sorcerer’s Howling Gale ability. If this happens, you will need to restart the dungeon, the easiest way to do so being for everyone to reset.
Once the room is completed, the door opposite to where you originally entered will open. Mages can blink through this door as it opens to get a head start in the next room.
Room 2 - Tahammul and Switches
Heading out of Room 1, there is a corridor that leads to an open area, with Tahammul in the middle and several rooms along the upper sides. There are two goals in this room, those being to defeat Tahammul and activate all of the switches in each of the rooms along the side on the upper level. Periodically, Bandits and Bandit Skirmishers will spawn. A solar laser will also spawn periodically and deal significant damage over time to 3 random players.
In general, most teams focus on defeating Tahammul first, then split up to go deal with the switches afterwards. If you have a particularly strong team, in order to save time, occasionally some players will start working on switches immediately, leaving Tahammul to the highest DPS players. Tahammul’s attacks can be quite strong, so while fighting him, make sure that you are not losing too much health. If you are close to dying, run away for a moment, heal, and then come back. Most of Tahammul’s attacks are dangerous up close (except for the cactus bomb, which you may need to dodge before healing if you are unlucky), so stepping away should be fairly safe.
If you are targeted by the solar laser, hiding behind cover (or behind enemy hitboxes) will prevent you from taking damage.
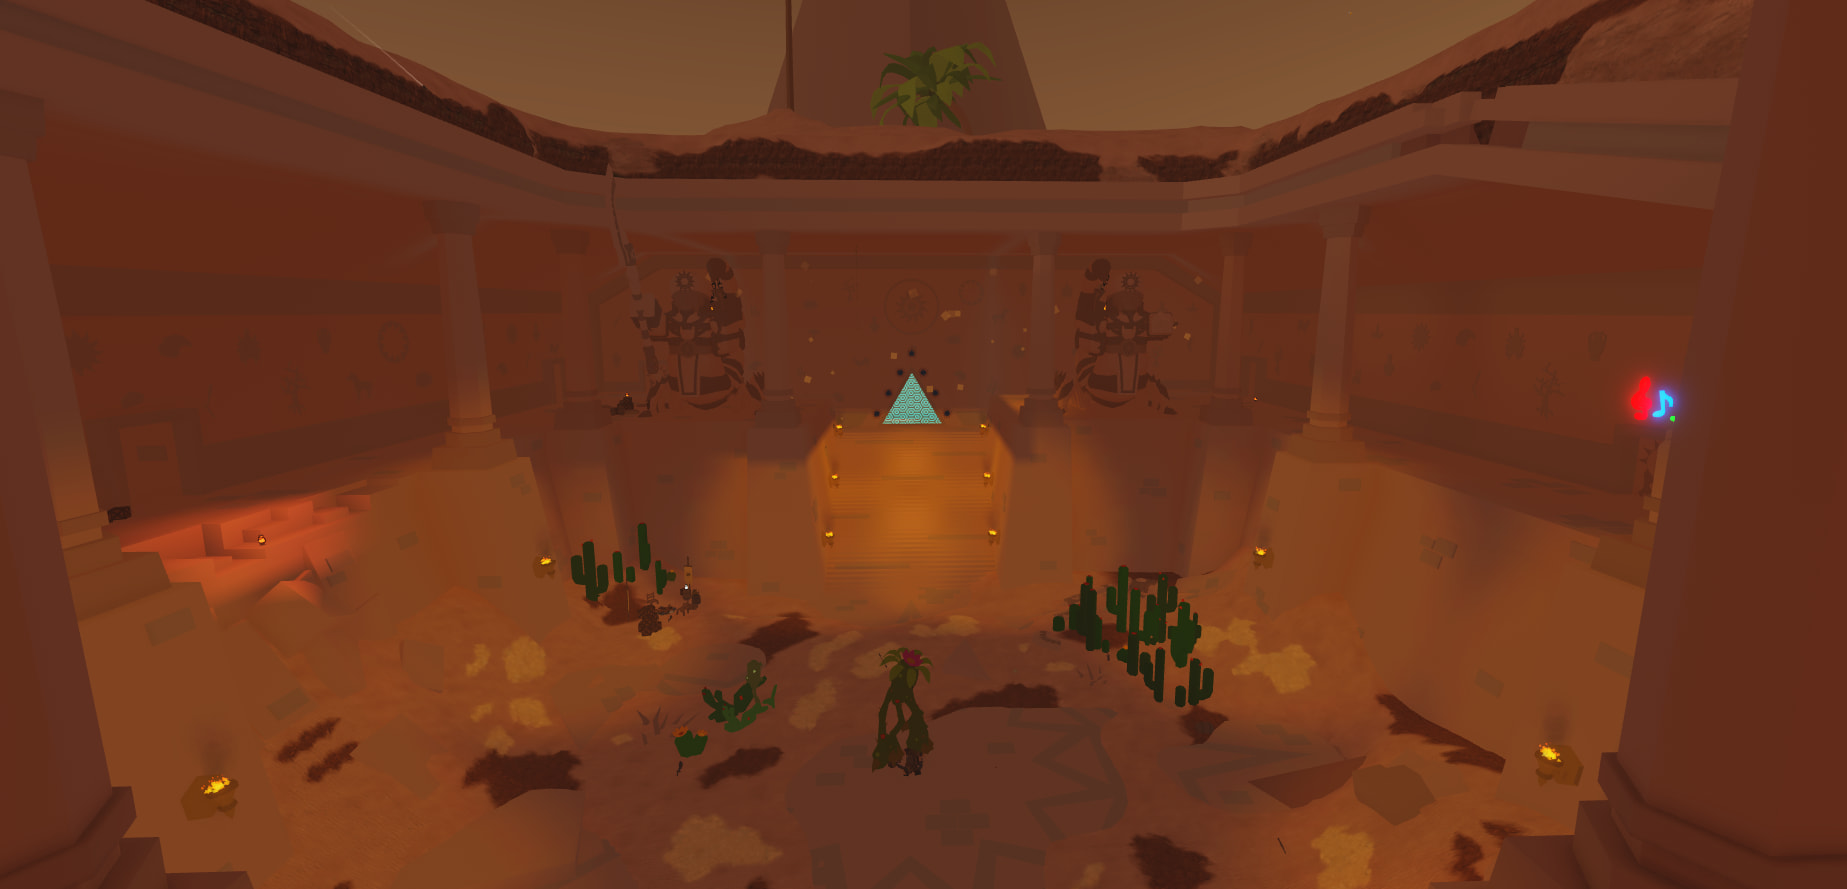
Each of the switch rooms can be found around the upper part of the arena, and are already open (the bonus rooms are the only ones requiring Tomb Keys). The rooms are fairly straightforward, though some platforming may be required to hit the switches.
Once all of the switches have been hit (indicated by them being lit up), the barrier leading to the next room will open. Note that during this time, the solar laser may still be active, so you will want to hide behind the stairs next to the barrier until it opens.
Room 3 - Masks
On entering this room, there is a pedestal directly in front along with four rooms, two on the upper level near the back of the room and two on the lower level closer to the front of the room where you enter.
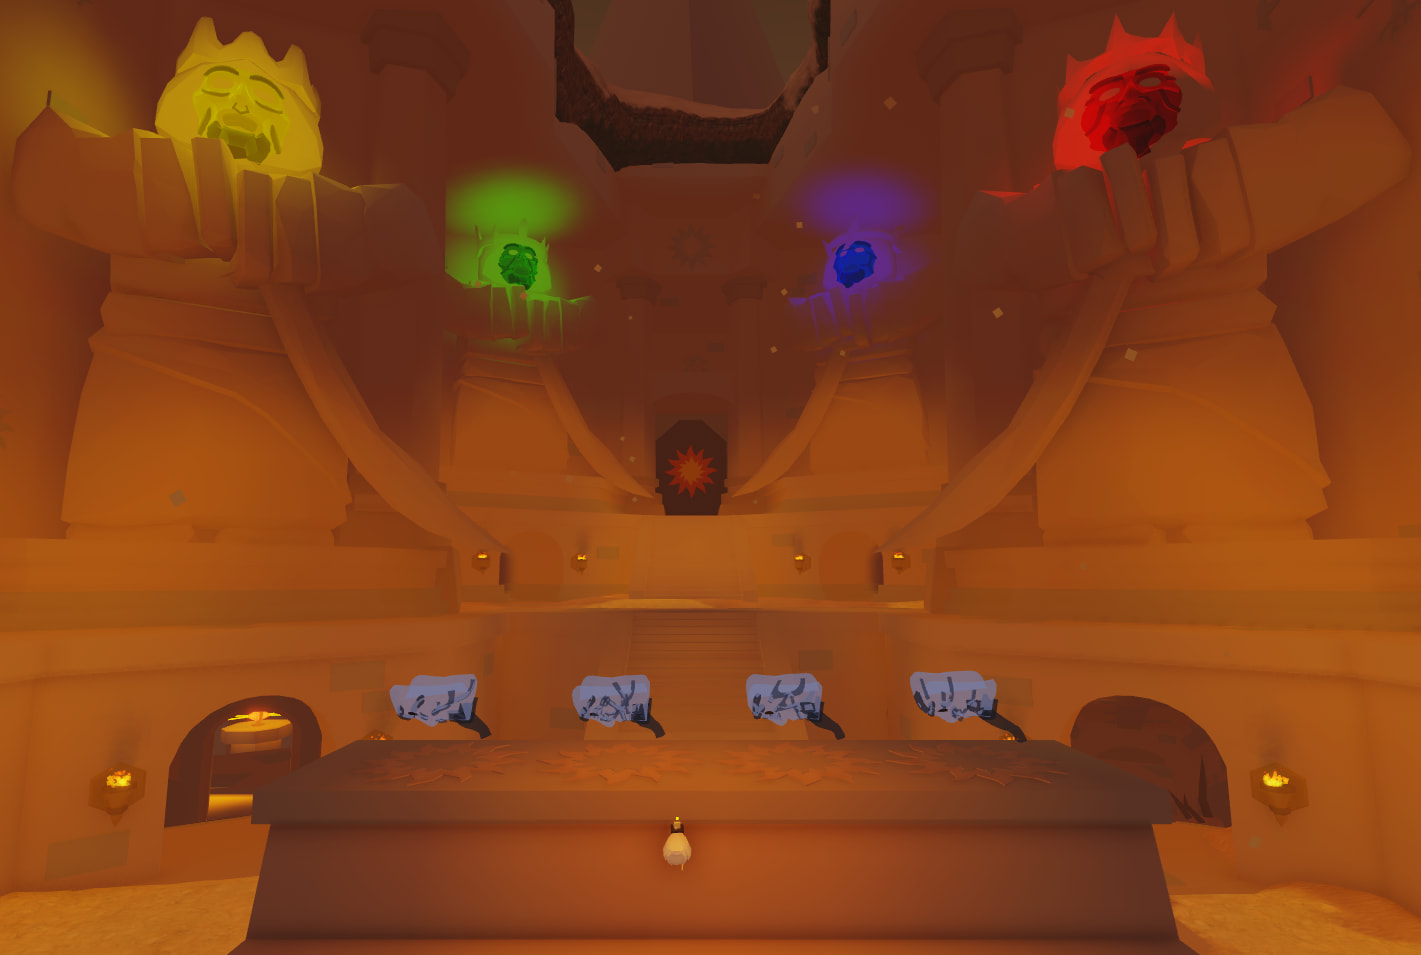
The goal is to recover all four masks and place them on the pedestal at the front of the room. Each room is marked by a colored mask on top of its entrance. It is generally best to have one person per room at a time. For a full party, two people can wait in the main room and can take over if someone in one of the room dies.
Yellow Mask Room
The yellow room is the lower left room, and is a circular room with a laser that spins around the center of the room.
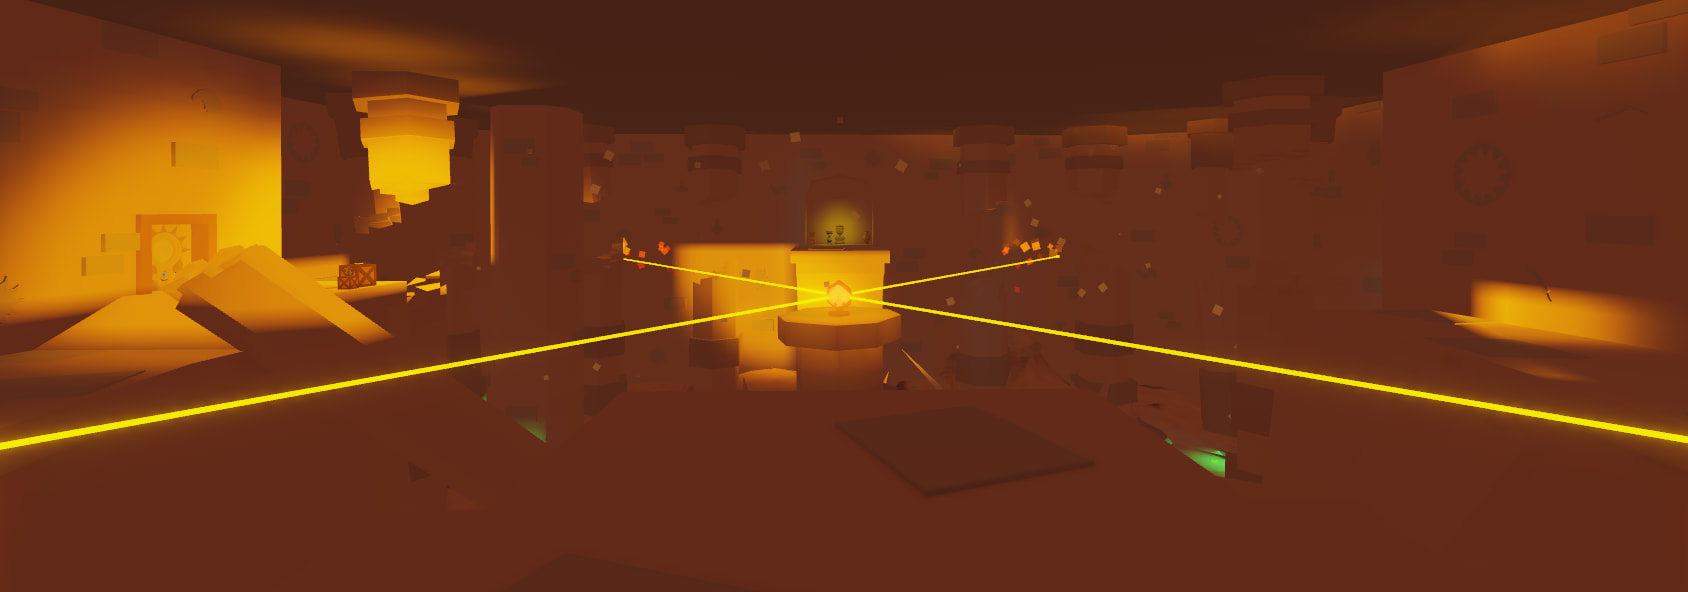
Upon entering the room, it will go dark, with only the light from the lasers illuminating the room. The easiest way to reach the mask is to go around the left side on the upper pathway, and then cross the destroyed pillars. to the mask platform. Alternatively, with enough vertical mobility, you can reach the mask platform, or one of the destroyed pillars leading to the platform from the lower level.
After obtaining the mask, the room will light up fully. You can leave the room by climbing up the fallen pillar in front of the bonus room entrance.
Green Mask Room
The green room is a fairly long obstacle course. Note that unlike the red mask room, the lava in this room is not an instant kill. The first room contains a flame spinner on the floor, spikes that come up in a pattern, and swinging axes. Note that the fire itself does not deal significant damage. The main concern are the axes and the spikes that come up from the floor, which also cause significant knockback. Try to follow the pattern of the spikes and the axe swings, and time your run appropriately, or use a mobility ability to get through the room quickly.
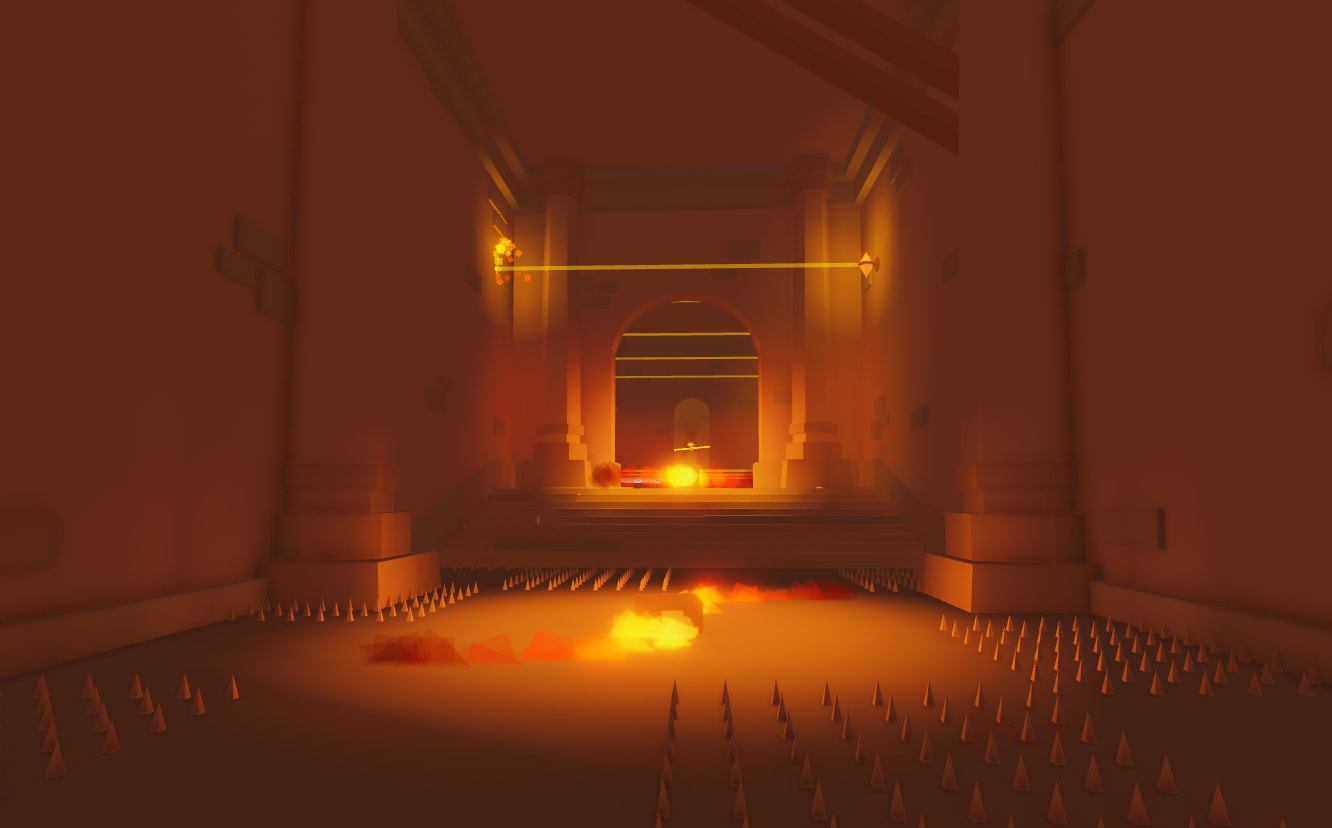
The next room contains a series of tiles that cause large spikes to appear, arrow traps that continually fire, and laser beams that move up and down. In general, it is best to move through this room as quickly as possible, but try to dodge as many of the lasers as possible. The other obstacles in the room are not a major concern, and can either be easily dodged or deal little damage.
Next, there are a series of platforms to jump on leading to an opening at the top of the wall, as well as a rotating laser beam near the top. This laser beam deals significant damage, and care should be taken to avoid it. Additionally, the second to last platform, indicated with a white symbol on it, is a pressure plate that triggers a wall to push you off into the lava, so you must jump to the next platform very quickly. The lava in this room also deals significant damage.
The following room contains boulders rolling down a ramp, with lava along the side. Since the boulders instantly kill you if you touch them, it is recommended to skip trying to avoid the boulders entirely and instead just swim through the lava to the round platform around the hole the boulders fall into, then walk around the perimeter to the final room.
The final room containing the mask only has a laser grid that moves back and forth. Wait until the grid moves out of the way to move towards the mask.
After reaching the mask, you then have to redo the obstacle course backwards. The obstacles do not change, so the same concepts apply.
Blue Mask Room
Upon entering the blue room, a sandstorm filter covers the screen, obscuring the player’s vision. The room starts with a walk in an outdoor area leading to the Tombwurm. Speed boosting gear and consumables can be useful here, but Horsehead is risky since there may be tornados that are difficult to see and that deal a significant amount of damage quickly.
After reaching the end of the pathway (going straight), you will reach an open area with the Tombwurm, which functions similar to a normal Dustwurm, but is significant larger. When approaching it, it will spit acid at you if you are at a distance, or will slam down and then begin burrowing if you get within melee range of it. Regardless of if you keep your distance, if it spits acid three times in a row, it will also begin burrowing. Once it begins burrowing, it will target the furthest player in range, shooting up once it reaches the player to try to grab it in its mouth, though this can be dodged by moving out of the way. If it succeeds, the player it grabs will be unable to move and will take substantial damage, then be spit out afterwards. You will need to stand on top of (or directly next to) one of the bomb cacti, which have a glowing red top (as seen in the center of the image below). Then, once the Tombwurm stops moving and gets ready to dig out of the ground, you will need to quickly move away to avoid getting hit (although if you do get grabbed, the bomb cactus damage will still be applied). This process must be repeated twice to kill the Tombwurm, which will drop the blue mask.
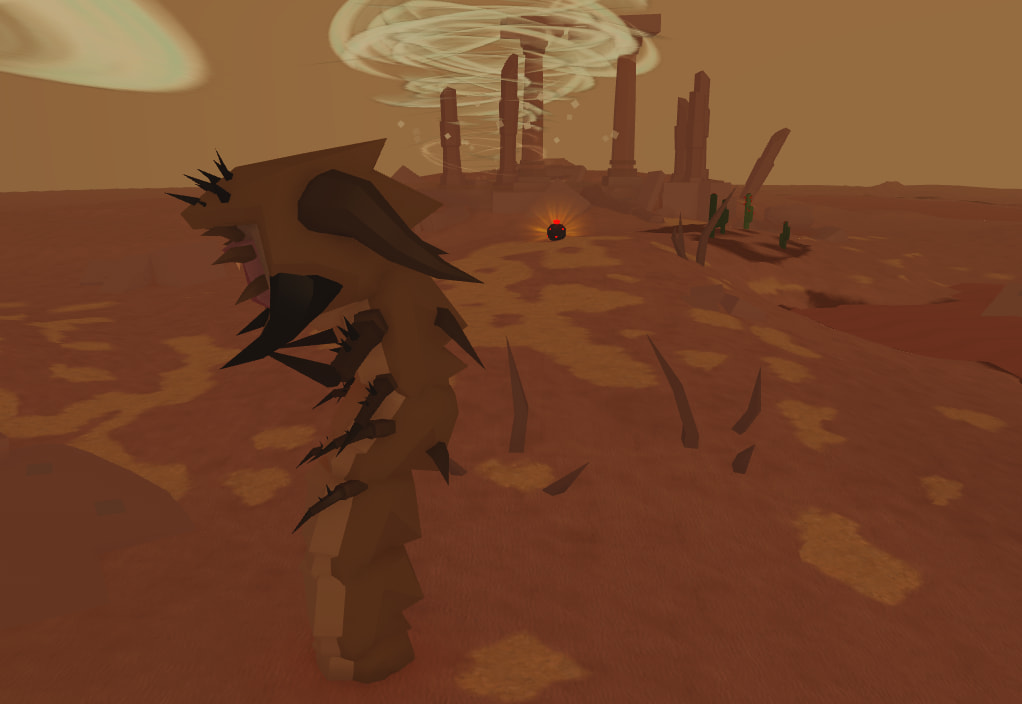
After obtaining the mask, you can return to the lobby the same way you came in, or you can run towards out of bounds, which will cause the screen to fade out and for you to be respawned directly at the mask pedestal, still with the mask. This is generally slightly faster than following the pathway normally.
Red Mask Room
The red room contains a series of platforms that collapse when stood on twice, as well as large alternating blocks that move in and out across the platforms, and a laser that moves horizontally across the grid of platforms. The goal is to make it to the end of the room to collect the mask. Note that falling in the lava in this room will result in instant death.
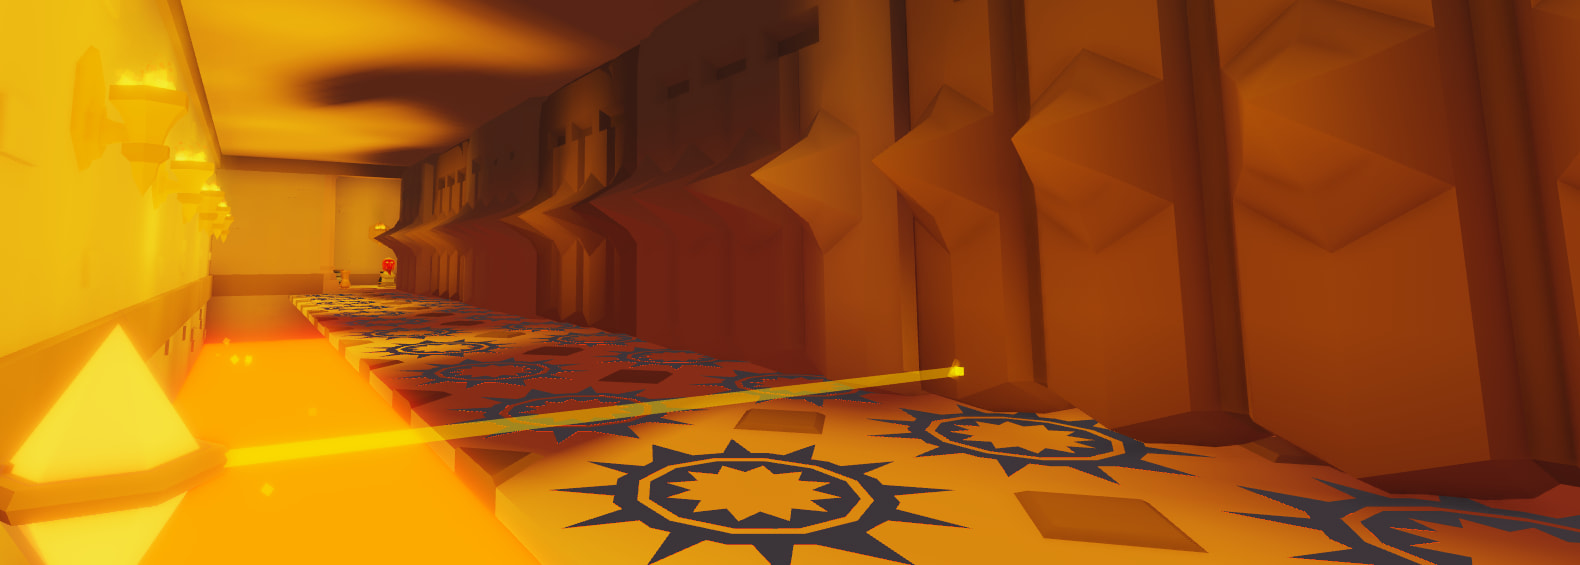
An important note when completing this room is that the platforms will not collapse provided you do not stand on them a second time, no matter how long you stand on them the first time. As such, you can take your time and slowly move across the platforms, moving to the next platform when the moving wall moves out of the way. However, it may be best to leave enough platforms that have not been stood on in order to allow for a return trip to be made. The laser does not deal enough damage to be worth making an additional jump for unless the timing works out.
You can also purposefully cause platforms to fall by jumping on them a second time before immediately jumping off, as there is a brief window where you can jump off of a falling platform. After a while, any platforms that have fallen will respawn, which can make it easier to go back after reaching the mask.
Alternatively, there is a small ledge along the left wall that can be navigated along to reach the mask or to go backwards. However, it is very thin and easy to fall off of, which would lead to death. Certain mobility abilities can also clip through the left wall, which can be used after collecting the mask to fall out of bounds and respawn at the mask pedestal.
Room 4 - Aqrabuamelu Warriors
After completing the mask room, the door across from the entrance will open, leading to a hallway containing a bonus room and leading to an arena with 2 Aqrabuamelu Warriors.
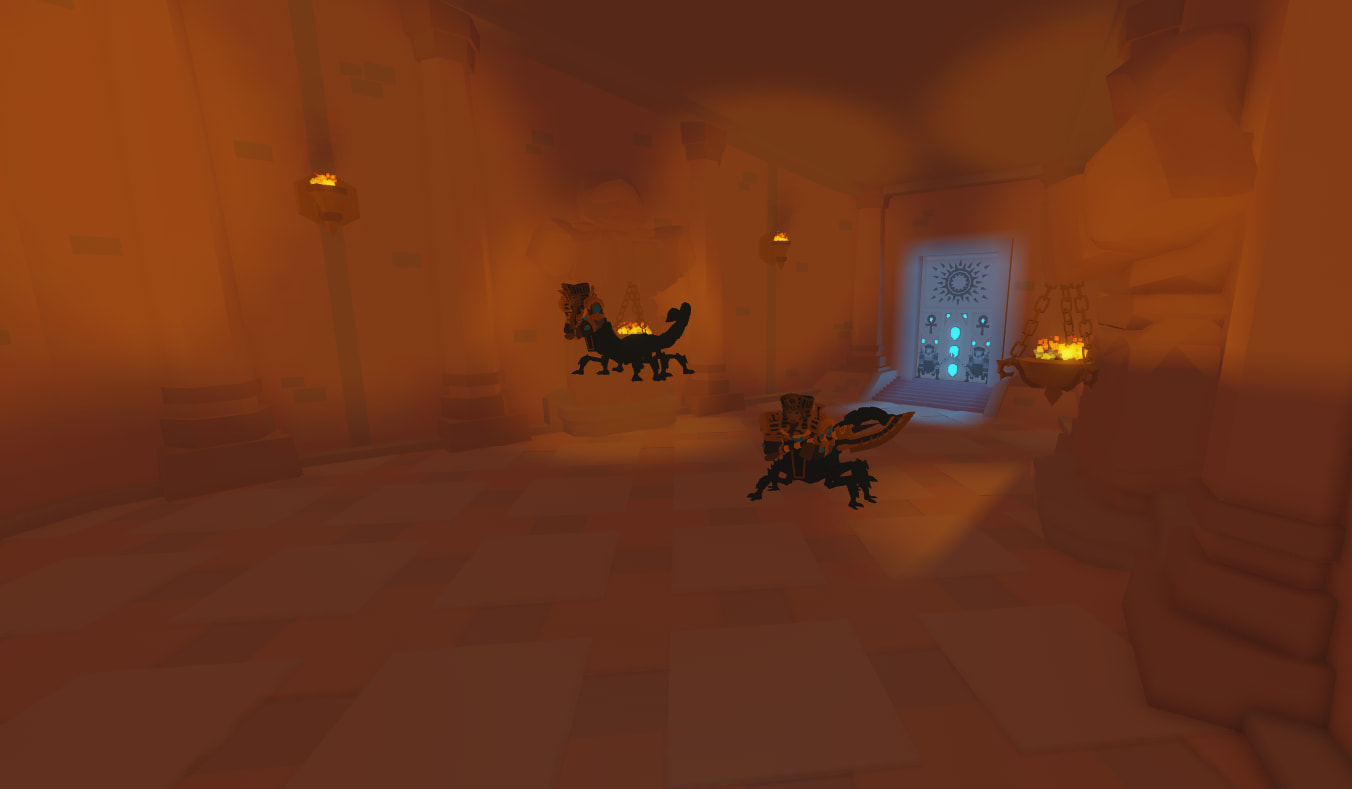
The goal is to kill both minibosses. The Aqrabuamelu Warriors are extremely dangerous, particularly at close and medium range, and can even kill very experienced players. If you stay at range, they will spit acid bombs at you, which burst into acid puddles similar to what the Spider Queen shoots. These puddles deal damage very quickly, and so if you are in one of them it is important to move as soon as possible.
At close and medium range, there are a number of melee attacks that the bosses can do. The first is a triple swing ending in a slam that stuns anyone caught in the (fairly large) radius. In addition to doing a lot of damage, the stun also leaves you vulnerable to the other enemy following up with another attack, which can be fatal. This slam can be dodged by jumping right as the slam comes down, as it only hits players who are on the ground. The other melee attack that they can use is a tail slam that hits several times quickly to the side. Both of these attacks do significant damage. Ideally, a Songweaver or other support class can help to heal the damage and maintain a shield on the melee DPS classes. If there is no support, however, then extra care must be taken to try to move out of the way of attacks as soon as possible.
Tal-Rey
After you beat the Aqrabuamelu Warriors, you will enter a cutscene with Tal-Rey. After the cutscene, you have the option to either accept or reject his offer to allow you to leave. In a party, the result is based on majority vote. If you accept his offer, you receive 5 Tomb Keys and the dungeon is considered a stalemate, which for the purposes of win streaks is considered to be a loss.
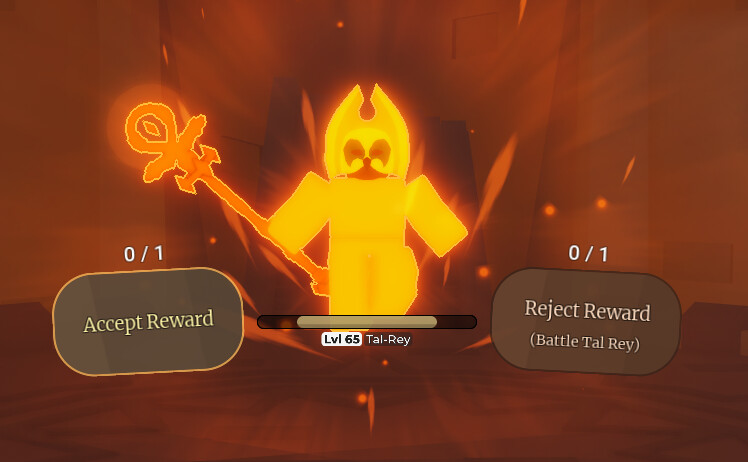
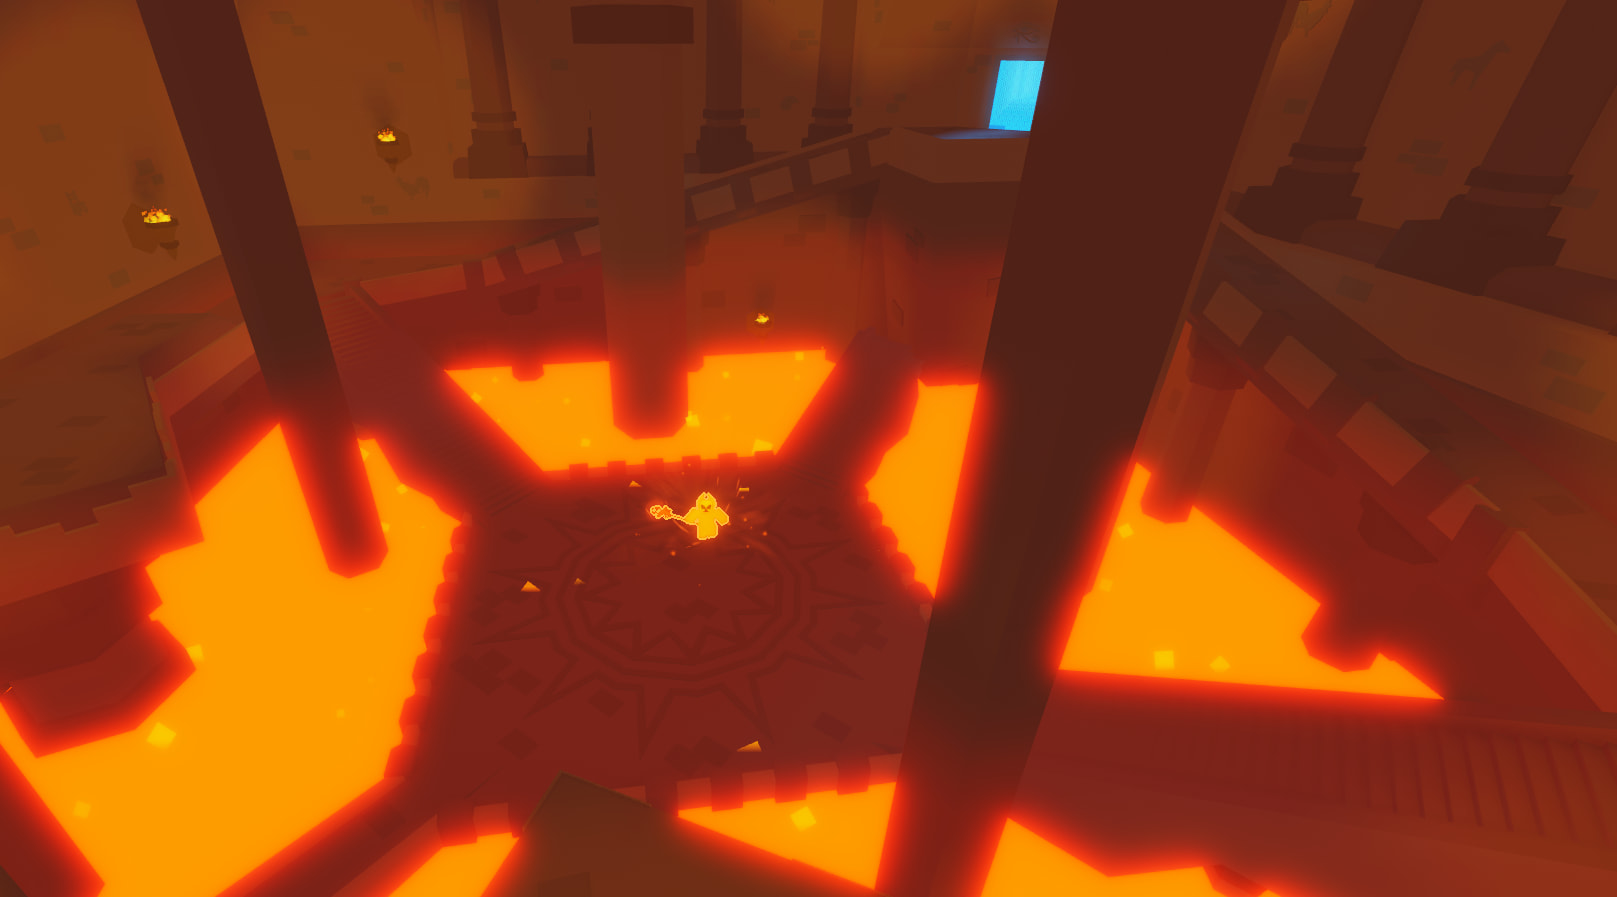
If you decline his offer, the arena fills with lava and the fight begins. Some general advice for the fight is to constantly keep an eye on Tal-Rey (particularly given that he teleports fairly frequently), and focus on dodging the heavy-hitting attacks. It is normal to regularly take damage from minor attacks that do between 200-300 damage or less. In general, your natural HP regeneration should be enough to heal that damage, so it is not recommended to use HP-restoring consumables for minor damage. The main attacks to watch out for will be detailed in each section respectively. For other attacks, see the extra sources below.
The numbers next to the headers for each of the phases describe at what HP the phase is entered into. For example, Phase 2 starts when Tal-Rey has 2.3M HP left, and ends when he has 1.3M HP left.
It is also worth noting that the lava around the arena is not an instant kill, unlike the red mask room lava. You can swim around in it provided you have enough health, although it will do damage every second or two while you are in it. The ability to swim in the lava is an important note for doing Phase 1 quickly and surviving a number of attacks in Phase 2 and Phase 3.
If a player dies during the fight, they will explode, dealing significant damage to all players close to them and causing Tal-Rey to heal 300k HP. If other players nearby are at low enough health, this can lead to a chain effect where one player’s death triggers an explosion that causes other players’ deaths, which do further damage and can potentially kill an entire party if everyone is standing close to each other. If you notice that one of your team members is getting close to dying, unless you are able to heal them, it may be best to run away if possible. Surviving also helps your team finish the fight earlier, as it prevents Tal-Rey from healing.
Tal-Rey Boss Fight - Phase 0 & 1 (3.3M - 2.3M)
Phase 0 is the portion of the boss fight that takes place between 3.3M HP and 3M HP. Tal-Rey can be damaged as you would any normal enemy. It is often a very short phase as most teams can deal 300k damage in a matter of seconds once the fight starts.
Phase 1 takes place between 3M and 2.3M HP. During this phase, Tal-Rey will become invincible to all attacks. He will occasionally spawn either a Mummy, Deathsting, or Baby Scarab. Once the enemy is killed, all players will receive a yellow glow and will be able to damage Tal-Rey while glowing, typically for around 15s, though it may be less depending on how long it took to kill the enemy.
Note that for the Mummy and Deathsting, if you lure them into the lava around the arena, they will die instantly. This is a commonly used strategy to speed up Phase 1, by having one player attack the mob and then jump into lava when the mob is close, then wait for it to walk off into the lava. Only one person should be responsible for luring the enemy in the middle. If more than one player attempts to lure the enemy, it will result in it not falling off the edge unless both players jump off at the same side. Typically, if a Knight is in the party, they will take care of this, as they can easily lure the enemy off using Taunt. However, this strategy works for any player if they damage the enemy first and jump off. This strategy does not work for Baby Scarab spawns. Generally, if a Baby Scarab spawns, the rest of the team will come back to kill it before going back to rush Tal-Rey.
A team with strong DPS can reach Phase 2 after only one spawn. Typically, this involves the high-DPS players following Tal-Rey and being ready to attack when the mob he spawns dies. It is still best to keep some space to avoid being hit by some of his attacks.
The main attacks to watch out for during these phases are his barrage and frostcall attacks. His barrage attack is telegraphed, with him letting out a short chant and fireballs appearing above his head. The attack will target a random player, quickly sending the fireballs towards them and potentially dealing significant damage if the player gets pushed into a corner and hit with all of them. Note that the fireballs are predictive, meaning that they try to pre-aim towards where the player is likely to be given their current direction and speed. To dodge this attack, you can either move behind a pillar such that the fireballs hit the pillar while trying to reach you, or move far enough away such that you have time to react to and dodge the fireballs he launches. If you are far enough away, spamming A and D while sprinting can also lead to the fireballs overshooting and missing you entirely, although it may take practice to get used to the timing. Being up close or having your back against a wall will typically lead to dying to this attack.
As for Tal-Rey’s frostcall attack, it can be a risk if you are standing close to him, particularly for melee classes. There is less of a visual indication for the attack, so you may get hit by the first few icicles. If you are hit by it, move to the side rather than backwards, as otherwise you may get hit by multiple icicles which can deal significant damage.
The only other attack worth noting from this phase is when Tal-Rey activates the glyphs around the outside of the arena. When a player is nearby, they will shoot down and deal quite a bit of damage on hit. When you notice that the glyphs have lit up (or you hear a “wooshing” sound indicating that the glyphs are shooting out) you will want to keep moving to clear out the nearby glyphs, then turn back around and stand in the area you cleared out. If you have to move to an area with active glyphs, keep moving, since they shoot at you where you stand, and are not predictive. Alternatively, faster players with enough stamina (such as certain Songweavers using Bunny Ears or other speed-boosting equipment) will sometimes purposefully trigger the glyphs around the arena to make it safe for everyone else. Although on its own this attack is not particularly strong, if you stand still when the attack is activated it could deal a significant amount of damage.
Tal-Rey Boss Fight - Phase 2 (2.3M - 1.3M)
At 2.3M HP, Tal-Rey will begin the phase by activating his “Supernova” attack. During this attack, a 15 second countdown will appear, and blue crystals will spawn around the arena, one for each player currently alive. Each player must enter into one of the crystals by interacting with it. Once a player has interacted with a crystal, it will turn yellow and no other player can use it. Any players not in a crystal by the end of the attack will be killed (even if using items that would normally prevent death). Tal-Rey will not cast any other attacks during this attack. After Tal-Rey casts supernova, he can be damaged in the center of the arena for roughly 15 seconds. After that, he will get up and become invulnerable to damage once again until he casts Supernova again during this phase.
There are 7 possible crystal locations, though only 6 will spawn with a full party where everyone is alive, and fewer if there are any dead players. The image below maps out all of the possible crystal locations.
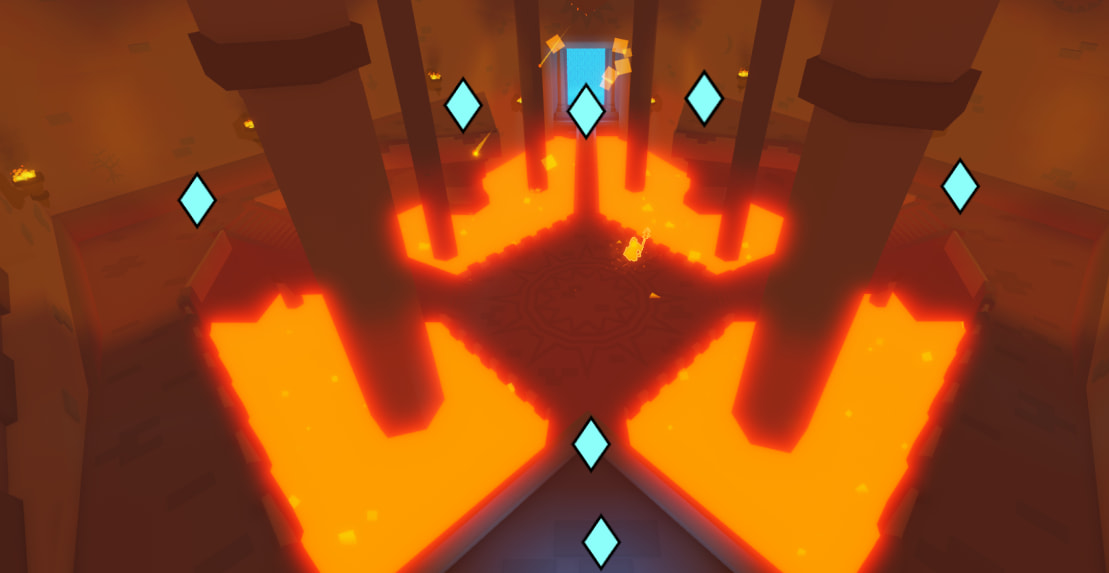
The general strategy for Supernova is to allow the slowest players to take the crystals closest to them, while the faster players take the crystals that no player is closest to, or that only they are close to. This requires some coordination and being able to mentally map out who can reach which crystals. If Tal-Rey has not casted Supernova in a while, it is also useful to spread out throughout the map in order to make it easier for everyone to get a crystal without leaving someone stuck having to run to a far away crystal.
Outside of Supernova, in addition to keeping all of his attacks from phase 1, Tal-Rey gains a number of extremely strong abilities during this phase that can cause significant issues for unprepared players. The first of these is his Harsh Sun ability. When he casts it, the screen will begin to darken and a sizzling sound will begin to play, with a sun spawning in the center of the room. Every player must break line of sight with the center of the room, either hiding behind pillars, in the lava, or behind other structures that do not have line of sight with the center of the room. Hiding behind the pillars will not stop you from taking damage, but significantly reduces the damage you take compared to not hiding behind pillars. You may want to use the Regeneration ability from the Adventurer book if you have hotbar space, and use HP-restoring consumables when you have taken enough damage to warrant their use. Note that Tal-Rey can still cast his other abilities during this time. This consequences of this will be discussed later on.
Another new ability during this phase is Crashing Sun. A player is selected at random, and a sun symbol will appear beneath them while a large sun appears above. After a few seconds, it will crash down with a sound indicator, dealing substantial damage to anyone caught in the blast. It is important to keep an eye on Tal-Rey’s voice lines during this phase specifically to identify this attack. Tal-Rey will either say “Crashing Sun!” or “Falter under the weight of a star!” when using this attack. If you see this voice lines, check underneath you to make sure you have not been targeted by the sun. Note that sometimes the symbol may not appear if you are on a ramp or stairs. If you are unsure whether or not you have been targeted, it is best to keep moving if possible, keeping an eye out for where the sun may have otherwise spawned.
The last new ability Tal-Rey gets during this phase is Scattering Doom. When he casts this ability a rotating spiral symbol will appear underneath every player. It will follow all players and grow in size, and after a couple seconds once it has grown large enough, it will stop, and shortly afterwards a large beam that grows slightly will spawn at its location, dealing significant damage to anyone caught in it. Note that a pillar will spawn at every player’s location they were in when the symbol stopped, which is why it is important to scatter and move away from everyone during this ability.
For both Crashing Sun and Scattering Doom, note that the hitboxes for the attacks linger slightly longer than their visuals do, so it is important to wait an extra moment before moving to a location one of those attacks just occurred in.
One final point to mention about this phase is the potential for overlap with Harsh Sun. Harsh Sun generally forces you to stay still behind a pillar to avoid damage, but both Crashing Sun and Scatter (as well as Glyph from phase 1) require that you move. One strategy is to hide on the small platforms on the lava closest to the left and right of the entrance, marked in green in the image below.
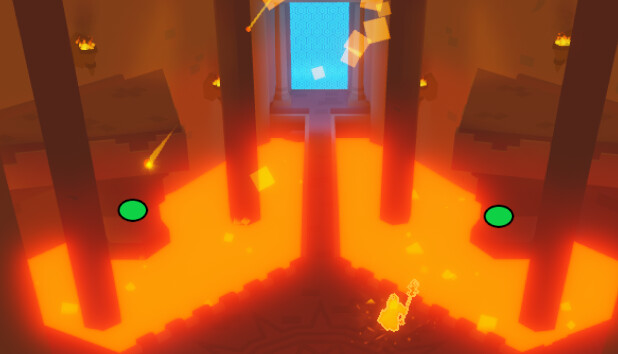
Both of these are covered on top by the upper platform, which prevents damage from Glyph or Crashing Sun if they are activated during Harsh Sun. Otherwise, if you are stuck behind a further pillar, try to stay behind the pillar for as long as possible, but prioritize dodging Crashing Sun and Glyph. You may need to quickly move to the closest nearby pillar to avoid these attacks if they occur at the same time as Harsh Sun. As far as Scattering Doom goes, this also requires moving to the closest nearby pillar once the spiral stops spinning, although you will want to time it such that you are spending the least amount of time in the open.
Tal-Rey Boss Fight - Phase 3 (1.3M - 33)
After Tal-Rey reaches 1.3M HP, he will begin to charge up Obliterate, and will become invincible during this time. A progress bar will appear in the bottom left corner. When it reaches 100 (after roughly a minute of charging), everyone is killed (regardless of if you have items that would normally prevent death) and it is immediately considered a loss. To avoid this, everyone must destroy the 7 crystals that spawn around the arena. These crystals use the same spawn locations as the crystals for Supernova in Phase 2, so refer to that image for the locations. Each of the crystals has roughly 200k HP, so a team without sufficient DPS, or where many of the DPS players have already died may be unable to destroy all of the crystals in time.
After all of the crystals are destroyed, Tal-Rey will unleash Obliterate, dealing damage to all players based on how long Obliterate has been charging. Afterwards, Tal-Rey can be damaged as normal at any time.
All of the abilities from Phase 2, excluding Supernova are carried over into Phase 3. Phase 3 also adds three new additional abilities, two of which are dangerous and the other still requiring some attention. The first of the dangerous abilities is Solar Laser. Tal-Rey will target one player and fire a laser at them, tracking the player perfectly and rapidly dealing damage and draining stamina each tick. The player who is targeted must get behind cover relative to Tal-Rey’s position. Note that he may teleport while casting Laser, which could change the direction that the player needs to take cover from. One possible way to deal with the laser is to jump into the lava while you are being targeted. The laser will not pass through the lava, and the lava itself deals significantly less damage than the laser.
The other dangerous ability Tal-Rey gains during this phase is Debris Throw. A piece of one of the pillars or stairs around the arena will begin to glow, and will gradually rise. After a couple seconds, it will be launched at a random player, causing an explosion where it lands. The damage dealt and size of the explosion is based on the size of debris thrown, but generally it will be similar to the damage dealt by Crashing Sun. Because of this ability, during Phase 3 it is important to regularly scan the arena and note any debris that will be thrown, and to hide behind a pillar when the debris is thrown at you, or otherwise dodge out of the way after it is thrown. Similar to Tal-Rey’s barrage, the debris is predictive, and so you will need to change direction after it is thrown.
The third ability which is less dangerous but still requires attention is Tal-Rey’s shield. Occasionally, Tal-Rey will gain a shield around him. This shield prevents any projectiles from hitting him from outside the shield and sends back a projectile towards any players that fire a projectile blocked by the shield, although players can walk through the shield and projectiles fired within the shield can still hit him. After some time has passed, the shield will begin to blink red and start to shrink. After it shrinks fully, it will explode, dealing damage to anyone inside. Generally, melee classes do not need to be as concerned with this ability, although it is important to move away when the shield begins shrinking, but ranged classes may need to move into melee range in order to deal damage, or should otherwise wait for the shield to explode before continuing to deal damage.
Tal-Rey never hits 0 HP, instead the health bar stops at 33 or 34 HP. At this point, Tal-Rey surrenders and disappears. You and your party will then receive the drops automatically (unlike other dungeons where you need to open a chest), although sometimes there is a noticeable delay on the drops being awarded.
After the Fight
There are additional rewards you can obtain if you have enough Holo Coins. Going to the top of the Tal-Rey arena (opposite to where you originally enter), a new room has opened up containing a machine with several slots to enter 20 Holo Coins. This machine generally awards one of the Stat Ampuoles or Vials of Mana/Health, but occasionally can award the Tech Spec or Holo Helm headgears, which are unique to this machine, as well as equipment that can be obtained from vases. On extremely rare occasions, the machine can drop Holo Weapons, which will be discussed next.
Behind the machine is another room that can be unlocked for 15 Tomb Keys. After being unlocked, an obby is unlocked which eventually leads to a room where Holo Weapons can be purchased for 300 Holo Coins each.
Additionally, after completing the fight, the previously cleared rooms become available, meaning that any bonus rooms that were originally skipped when going through the dungeon can be unlocked and completed. After completing the dungeon, you will always respawn at the boss room, and so you have unlimited attempts to complete the side rooms.
Extra Sources
Vesteria Wiki - Tal-Rey’s Tomb - Extra details on ending rooms and rewards
Vesteria Wiki - Tal-Rey - Provides additional details on all of Tal-Rey’s attacks
idk321456 (Discord) - Tal-Rey Guide - Useful information regarding the Tal-Rey fight, and examples videos and diagrams for further details
Andygogo (YouTube) - The ULTIMATE Tal-Rey’s Tomb Guide - Good video showcasing the entire dungeon and providing team composition strategy, although slightly outdated
Maxwell_555 (YouTube) - All vase locations in Tal Rey’s Tomb - Video showing all the locations of vases, also showcases the bonus rooms
round945 (Discord) - The Definitive Guide Portal - Provides links to various guide posts on the Vesteria Discord server, including ones that provide builds for each class.
Special Thanks
Thanks to azgdzg for providing feedback on the guide and correcting a number of errors.